When you click on links to various merchants on this site and make a purchase, this can result in this site earning a commission. Affiliate programs and affiliations include, but are not limited to, the eBay Partner Network. As an Amazon Associate I earn from qualifying purchases. #ad #promotions


The summer is upon us, and for many a miner cooling issues are important. Especially if you have a larger server or several servers. This guide is going to breakdown the calculations, configuration, setup and install, and impact measurements to get a micro cooling center running cost effectively for your coin plotting/farming/mining servers. Let’s get started here!
Insulate your garage for mining server, while this guide is older, it still applies just the same today. This is going to save you a LOT of energy! My insulated garage door once finished.
Mining and/or Server Cooling Location and Materials
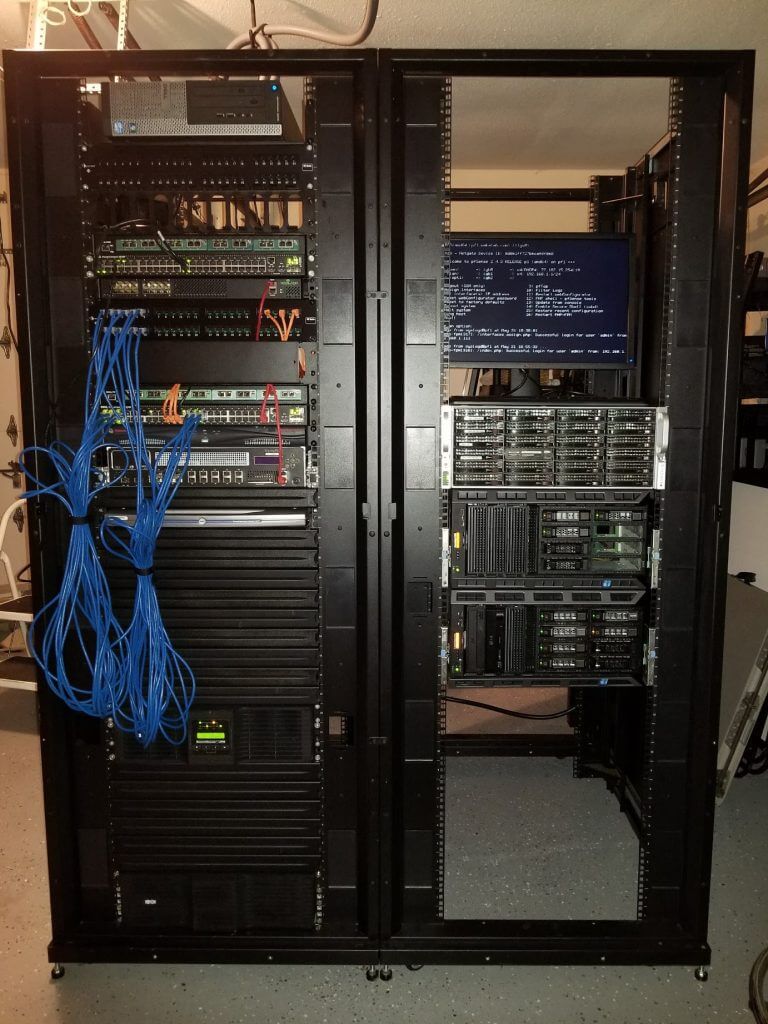
So, there are a few places that you might have your mining servers set up. A spare room in your house or a garage being some of the ones that pop out at me right off the bat. I have my server in the garage and also live in Austin, TX… it is really hot during the summer. There are a few items we need to check into before we start doing the calculations for the room that you will be using / converting. If you are in a room in your house with a window, that is the best location you can hope for. In a garage we have more challenges…but typically more space and more electrical access…at least I do. If you’re interested in what my setup looked like prior to the AC install in our prior house, here are a few snaps in our first house.
So why is location important? Insulation! You need to not be fighting an impossible battle and without certain things in place, you will have a much harder time getting the best bang for your cooling buck. So, I mentioned I am in a garage, which of course means I also have a garage door. This is a problem for two reasons. First it is made of Aluminum and heats up very nice when the sun is blazing. Second, it’s a giant freaking door. You have to take into account that it’s going to try to leak air. Luckily, we live in a world of solutions! The garage door itself needs to be insulated and sealed. This is a surprisingly easy task however so fear not! I was panicked when I started doing all this, but it only took me couple hours to do alone so I was imagining something much worse than it turned out to be.
Material List
I’m going to assume that you have the basic tools including a utility knife, wrenches, and a drill. The rest of the stuff you’ll need is outlined here. Insulation is itchy, long sleeves are a good idea. Don’t hurt yourself!
Cooling Calculations
You have a Mining or Server room level of heat that will be generating in your garage or room space if you have a lot of servers. Lot of rigs, cards, servers = lots of heat. Every watt of power that these cards draw, they create a Watt of heat. 1 Watt of heat = 3.412 BTU of heat. So we are going to add up everything that is running to get a total number of BTU here.
Server Equipment: There are 2 ways to calculate the server equipment. Accurate would be to look at every component, but probably safer to assume you are maxing that PSU. So take the total wattage of the UPS * the total number of UPS’s.
I have 2 * 750 readings on my UPS’s = 1500 watts running 24/7 between home media server, Server Rack and networking.
So, when I look now at that from a BTU rate, that is 1500 * 3.412 = 5118 BTU’s. We need to have this number on hand when we evaluate cooling options. Round that up to the nearest thousand. We need a 6K BTU unit. Lucky me and you if you are in this bracket of heat generation. Most slightly larger units are the same price. Most prices look to increase sharper at the 10K BTU range and up. Also nice, these units do not have a huge electrical demand.
Every linear foot away from the units to be cooled the unit is, add 500 BTU to cooling needs. Im 1.5 feet
Picking out that A/C Unit:
If you are in a garage without a window, then a portable A/C unit is going to be your best option. Also, if you have a HOA, that may be a factor in which type of unit you choose. If you are in an interior room in a house, then you will use a portable A/C. (exhaust to attic) I’m doing the install guide based off my system and installation. You also must use a dual hose portable; the single ones are worthless.
Portable Units:
Mine doesn’t have the cool looking remote but the rest of the specs look the same and the shape looks about the same also. You can checkout mine below in the install guide, the hose kits look identical and are both 5″ sized.
Window Units:
If you have a window, you can use a window A/C unit. They don’t require you to drill huge holes in walls. However, they are a bit tacky and not easy to move around. I’m not going to go into the install advice for a window A/C unit. It should have adequate directions included.
Models:
Model – SM24N30A – Huge unit if you need to cool over 9000 Watts of cards. Note that’s 230 VAC. Has a wifi app? Cool.
Model – SS12N10B (Standard Plug) – 120 standard plug for smaller racks. Still has the wifi remote monitor app, however.
While a wifi app is cool and all, Budget is cool, too. After all it’s A/C we are after here.
This Frigidaire 12000 BTU Window AC is a great price for 12000 BTU @ 349 minus 5% extra
Mini-Split Systems
If you are a badass with a bunch of servers or have a lot of money to blow, use a split system. They are awesome, costly and need some good install help. I’m not going to go into the install advice for a split system, as I have no idea. They do cool large open areas very nice from what I have seen in the city with some friends who have townhomes. They gave me a recommendation for 12K – 36K BTU systems as follows:
Model: ENSTH122 – 12K BTU’s
Model: – 24K BTU’s
Model: – 36K BTU’s
AC Setup and Install
So, we have two things that we need to address to get up and running. Insulation and installing the A/C unit. I’ll start with installing the A/C unit first here as it important to get done ASAP before it heats up too much. Again, long sleeves, early morning, and an extra set of hands if you can find ’em will be helpful. I did it myself as I live pretty far away from most of my friends who would help out with a job like this. Wife was minimally helpful at best but did tell me it looked nice… yay. Insulation of the garage door was 2 and a half hours. I have a single car garage so I think you may be looking at 4 hours on your own installing for a 2-car garage. I also insulated the attic of the garage, since it didn’t have any insulation. Unbacked insulation for that to prevent mildew. Luckily, we have good attic vents. I live in Southwest Austin for reference, it gets HOT here in the summer but has been relatively cool so far this year!
Insulation of the garage door should follow these steps:
Clean off any existing dust on the garage door support braces and hanger mount locations in the middle of each pane. It is a good idea to do this with alcohol water spray. It is dirty (trust me) and will give you issues with taping later. DO NOT USE DUCT TAPE! IT WILL DO THIS CRAP!
dontuseduct
I guess I found the first thing that duct tape doesn’t work for.
Cut the insulation pieces. This goes fast if you do it like an assembly line and cut all the lengths first.
Stick the hangers on. It goes fast.
Hang the insulation pieces. Cut a small slit in the middle for each hanger to poke through.
Grab that aluminum tape and start taping the sides. You may even get OCD and remove some hardware to get a ultra pro looking install. It’s okay, I won’t judge 😉
prolookin tape insulation job
Make it look good 😉
Relax for a bit. Good job! If you are insulating the attic, I feel that pain. Best luck to you.
Insulate attic (if needed) Don’t skip this ’cause you get lazy. It does suck. It will make a huge difference, however. With my attic and garage door insulated I have needed to run the A/C unit only if it gets to ~84 outside. It would be very hot without them both insulated. If you have a window, foil it over and saran wrap insulate it. Careful to not fall through the ceiling and watch out for electrical wires and roof nails! Insulation goes UNDER wires, or slit a path. Never insulate over wires. Don’t jam the insulation up to the edges. You need to leave the soffits clear with a clear path for air to get drawn in on all edges. Also, make sure you have a nice, good seal on the attic door so that you are as close to airtight as possible. A/C will push and pull into seems and cracks.
Insulating the attic is a very itchy job. However, my garage now feels as insulated as the rest of my house. Plus it’s quiet.
Insulating the attic is a very itchy job. However, my garage now feels as insulated as the rest of my house. Plus it’s quiet.
Okay attic insulation will take a long time. It will suck. I hope it is over. Grab some water. Wanna get super energy efficient? I’m talking attic fan! I installed one last year and our indoor A/C doesn’t kick on until it gets over 88 outside.
Garage door seal. If you have a new-ish house this should be pretty tight already. Mine already has rubber seals installed so the garage door seals up nice. If not go ahead and do that now.
Check for other air leak areas. Got oddball drilled holes for some reason? (like electrical installs…) Caulk that up. Windows? Check those for leakiness and caulk.
Install the A/C unit (portable A/C unit)
Okay so you have the portable A/C unit present and now are ready to install that bad boy! Find a place that is in a good position for the A/C unit to plug into a circuit that you don’t have unprotected electronics running on already. Plug it in and move the unit around so you can get a good placement of the unit. It needs to have space around it. Dont smush it’s back directly into the wall. I’d say 2 feet minimum is needed.
Make sure you have the unit pointed correctly and spaced out a bit. Here it is installed.
Make sure you have the unit pointed correctly and spaced out a bit. Here it is installed.
Now that you have the placement of the unit, go ahead and get out the hoses for the unit (double hoses) and install them onto the back of the unit. Make sure that you have no crazy bends in them as you stretch them to their eventual placement on the wall. Mark the spot for both the output and input vents. POINT THE A/C TOWARD YOUR SERVERS!
Check for a stud in the middle of the area you marked. That will give you a big problem if you accidentally drill into it. Plus, extra holes in a house = bad. Okay, so you should also space the placements out so that they have 1 stud in between them. You don’t wanna suck in your exhaust vents heat.
Don’t screw this up. You don’t want lots of holes in the wall.
Don’t screw this up. You don’t want lots of holes in the wall.
Get out the hole drill and shank. Attach to your drill. Drill. Do it from the inside to the outside. This will prevent something bad from happening. Trust me. Once you have the tip of the shank drilled past the exterior of your house’s exterior material, then you can go outside and drill inside with perfect precision thanks to that hole.
Grab the Louvered exhaust vents. Remove the backdraft louvers from the intake one at a minimum. I removed them both and installed 2 bird guards. They will bend a bit to let you pop them out.
You can bend and remove the backdraft louvers pretty easily from these.
You can bend and remove the backdraft louvers pretty easily from these.
Install them from the outside to the inside.
Fasten them into place. Now head back inside.
Hey that looks pretty good after all!
Hey that looks pretty good after all!
You will need to tape up the 5″ to 4″ reducers now to the exhaust hose and intake hose from the unit. Use the Aluminum Tape here also. Do a really good job taping those.
Now “mate” the reducer to the wall exhaust. I was able to jam mine into it a bit and then tape over them to hold it in place very snuggly.
Do a good job with the tape here. Finally, it’s looking done!
Do a good job with the tape here. Finally, it’s looking done!
Follow the rest of the checklist items for the first turnon. You shouldn’t need to worry here about a drain line, as this will automatically exhaust the evaporate with the heat (another reason not to have any crazy kinks in that exhaust line run).
Set it to auto cool and a temp around the 80’s to kick in the A/C cooling. My model runs the fan constantly regardless of if it’s cooling or not but does so at very low wattage draw.
I am now ready to have nature bring on those 100+ days!
Other Thoughts:
I now actually put a nice chair out in the garage and am in the process of “caving” it out a bit. It is crazy all this is running, and so quietly! Plus, since it’s humidity controlled now I’m storing my telescope equipment in the garage. More room in the house as a result 🙂 I installed a dartboard and have IPTV in there. Now I need a small Keg and I’ll be set!
The garage is now comfy and becoming a man-cave also.
The garage is now comfy and becoming a man-cave also.